As an Amazon Associate, we earn from qualifying purchases. Some links on this site are affiliate links at no extra cost to you. Our recommendations are based on thorough research and editorial judgment.

Macos Privacy: Camera, Mic, and App Permissions
On macOS, we can efficiently manage privacy for our camera, microphone, and app permissions. Built-in apps like FaceTime automatically access these features, but third-party apps need our approval. To manage permissions, we can go to System Preferences > Security & Privacy > Privacy tab. There, we can grant or deny access as needed. Regular checks help guarantee that only trusted apps have permissions. If you’re facing issues, there’s more to explore about troubleshooting and using Terminal commands.
Key Takeaways
- Manage camera and microphone access in System Preferences under Security & Privacy > Privacy settings for better control over app permissions.
- Third-party apps require user permission to access camera and microphone; built-in apps access these features automatically.
- Regularly review permission settings to ensure only trusted applications have access to your camera and microphone.
- Troubleshoot access issues by verifying app permissions, resetting microphone access, or creating a new user account for testing.
- Utilize Terminal commands like `tccutil reset Microphone` for advanced permission management on macOS.
Understanding Camera and Microphone Privacy on Macos
You may be interested


When we think about privacy on our Macs, how much control do we really have over our camera and microphone? In macOS, we have the ability to manage which apps can access these features.
- Built-in apps like FaceTime and Photo Booth automatically access the camera and microphone, requiring no extra permissions.
- For third-party apps, we need to give permission, and access requests appear only after the app prompts us.
- The green indicator light next to the camera informs us when it’s active, adding an extra layer of security.
It’s essential to understand that privacy policies for third-party applications may vary from Apple’s. Staying informed about how our data is used when granting permissions helps safeguard our privacy while using the camera and microphone. The system also lets you verify app compatibility with accessories like keyboards and Magic Keyboard to ensure seamless permission behavior.
Accessing System Preferences for Permission Settings

To effectively manage our privacy settings on macOS, we should know how to access the System Preferences. Here’s how to navigate to the vital settings:
- Open System Preferences from the Apple menu.
- Select Security & Privacy, then click the Privacy tab.
In the Privacy section, we can handle our Camera permission and Microphone access. Applications will show up here only after they’ve requested permission, so we’ll need to launch the app that uses the camera or microphone first.
Additionally, some default apps like FaceTime and Photo Booth automatically gain access. It’s also important to update macOS regularly to maintain proper functioning and guarantee permission requests work correctly, especially after upgrading to macOS Mojave. Newer MacBooks with Apple silicon may have different external display behaviors when connecting multiple monitors via adapters.
Recommended Products

Privacy Protection: CloudValley webcam cover is designed for those who prioritize privacy, security, and peace of mind when using laptops, tablets, and computers
![Webcam Cover Slide, [6 - Pack]Ultra-Thin Web Camera Cover for Laptops, PC,Computer and Apple Devices like MacBook,iMac, iPad and iPhone 6/7/8 Plus.0.022in Thick Web Blocker for Privacy and Security](https://m.media-amazon.com/images/I/411DuUdkmHL._SL500_.jpg)
【Protect Privacy Security】Focusing on network security, now we can easily and effectively protect personal and family privacy security , Just gently slide the slide and close the camera, you can stop the intrusion of hackers.
![Upgrade Webcam Camera Cover, [6-Pack] 0.023 inch Metal Camera Cover Slide](https://m.media-amazon.com/images/I/41gF0cVK5qL._SL500_.jpg)
✅【Upgrade Magnet】The latest NdFeB magnet technology, enhancing the magnetic force, in order to address the issue of the frequent drop.
Default App Access and Permissions Management

Managing access permissions for default and third-party apps on macOS is vital for protecting our privacy. Default apps like FaceTime and Photo Booth automatically access the camera without seeking user permission, which can feel intrusive. For third-party apps, we must actively manage camera and microphone privacy.
- Managing Permissions: We can adjust access through System Preferences under Privacy & Security.
- User Control: When a third-party app requests camera or microphone access, it appears in our permissions list. We can choose to grant or deny access.
- Review Privacy Policies: Third-party apps often have different privacy policies than Apple, so it’s important to review these before permitting access. Many users also improve physical security by elevating monitors or using monitor stands with built-in storage to reduce desk clutter and maintain a tidy workspace, which can help prevent accidental camera exposure two-tier design.
Recommended Products

Ajustable Desktop Sun Shade :Block harsh sunlight from side or front windows when you sit beside the window . With 20*40inch coated sliver fabric shade mounted on a poster stand . Small size with less eye attention from your boss .Noted: this cannot block flourscent or verhead light .

AUTOMATIC CORRECTION: Our 1080P Full HD webcam delivers razor-sharp video at 30fps, so you always look your best during important meetings, job interviews and video calls. Advanced H.264 compression ensures smooth streaming even with slow internet, and automatic light correction fixes dark, grainy footage in any lighting condition.
![Mamol [2 Pack] 24 Inch Computer Privacy Screen for 16:9 Widescreen Monitor](https://m.media-amazon.com/images/I/41SBKw3J4ML._SL500_.jpg)
【24 PRIVACY FILTER DIMENSIONS】 Width: 20 15/16" (20.9 inches/532 mm), Height: 11 13/16" (11.8 inches/299 mm) - 16:9 Aspect Ratio. Mamol computer privacy filters are designed to be perfectly compatible with HP, Samsung, Dell, Lenovo, Acer, Asus, LG, ViewSonic and other brands of monitors. Please check the width and height dimensions of your computer screen before ordering. If you have any questions about the dimensions, please contact us.
Troubleshooting Camera and Microphone Access Issues

Even with careful management of app permissions, issues can still arise with camera and microphone access on macOS. Here’s how we can troubleshoot these challenges:
- Check System Preferences: Verify affected applications are listed under Camera and Microphone in System Preferences; they may only appear after requesting access.
- Reset Microphone Permissions: We can reset these permissions using the Terminal command `tccutil reset Microphone`.
- Create a New User Account: This helps identify if the problem is tied to specific settings or restrictions in our original account.
- System Integrity Protection (SIP): Disabling and re-enabling SIP may affect permissions. It’s best to keep SIP enabled for proper functionality.
- Launch from Terminal: Sometimes, running applications from Terminal can prompt necessary permissions.
High-speed scanners with features like a 100-sheet ADF can significantly streamline document workflows, which is useful when digitizing materials to reduce reliance on physical files and limit camera/mic access needs for document sharing (see 100-sheet ADF for reference).
Recommended Products

Fastest scan speeds in its class among TWAIN-enabled scanners³ — scans at up to 45 ppm/90 ipm²; single-pass duplex scanning

FAST DOCUMENT SCANNING — Document scanner with feeder allows you to speed through stacks with a 50-sheet Auto Document Feeder (ADF); Efficient office scanner to help you scan more productively

OUR MOST ADVANCED SCANSNAP. Large touchscreen, fast 45ppm double-sided scanning, 100-sheet document feeder, Wi-Fi and USB connectivity, automatic optimizations, and support for cloud services. Upgraded replacement for the discontinued iX1600
Utilizing Terminal Commands for Permissions
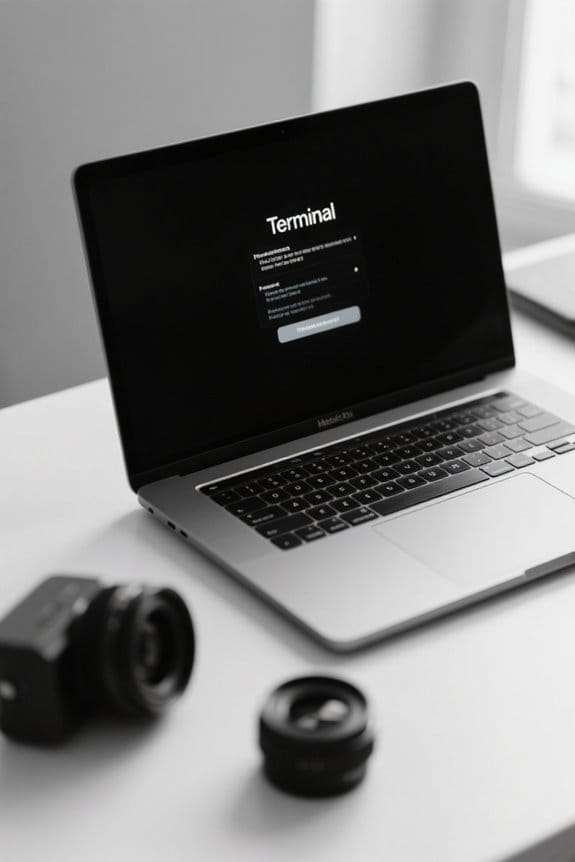
When we want to manage app permissions on macOS, utilizing Terminal commands can be a straightforward yet powerful approach. Here are some key commands to control microphone and camera access:
- Reset Permissions: Use `tccutil reset Microphone` to reset microphone permissions and prompt apps again.
- Grant Access: The `tccctl` utility allows us to grant specific permissions directly. For example, `tccctl –grant -b
-s kTCCServiceMicrophone` helps allow access to the microphone for specific apps. - Backup TCC Database: It’s important to back up the TCC database before making changes. Use `cp ~/Library/Application Support/com.apple.TCC/TCC.db ~/TCC.db.bak` for this.
Using these Terminal commands, we can effectively manage permissions in macOS Mojave and later versions. Regularly checking compatibility with your device size and system specifications can help avoid issues when applying changes.
Recommended Products


System Integrity Protection and Its Impact
System Integrity Protection (SIP) stands as an essential safeguard within macOS, designed to enhance our system’s security. SIP restricts access to system files, which helps prevent malicious software from altering critical configurations. When SIP is enabled, applications may struggle to request camera and microphone permissions, impacting their functionality.
To check or modify SIP, we can restart our Mac in Recovery Mode and use Terminal commands. However, this requires administrative access. Disabling SIP can introduce security vulnerabilities, allowing more freedom for applications, yet some applications may need this flexibility for proper functioning.
Re-enabling SIP afterward can restore the usual behavior for permission requests, balancing application functionality with security in macOS. Always weigh these factors carefully when managing your system settings. A number of popular content-creation tools, including USB dynamic microphones like the Samson Q2U, may require adjusted permissions or interfaces to work correctly.
Maintaining Updated Software for Effective Permissions
To effectively manage camera and microphone permissions, we should regularly update our macOS and applications. Keeping our software updated is essential for several reasons:
- Compatibility: Updates often include features that guarantee our camera and microphone permissions work correctly.
- Security: Updated software helps protect against potential threats, improving our overall security.
- Application Performance: Running the latest versions of applications, like browsers, guarantees we can effectively use camera and microphone access.
- System Preferences: An updated macOS can resolve issues where applications don’t appear in the permissions list.
Portable USB-powered lights like the Mudder USB offer convenient, low-power illumination for typing in low-light conditions.
Recommended Products

Superior Brightness Enjoy crisp, natural lighting with our office lamp, designed to enhance focus and reduce eye fatigue. With 500 lumens of brightness and high CRI, it delivers vivid, accurate colors for reading, writing, or designing. The LED technology lasts up to 20,000 hours, ensuring long-term efficiency without flickering or overheating. Upgrade your workspace with a powerful and energy-efficient desk light

【TOUCH CONTROL DIMMABLE DESK LAMP】 the LED desk light has 5 light colors and 3 brightness levels. You can easily choose a variety of lights for painting, reading, writing, crafts, nail light for desk, kindle reading lighting needs. easily adjust the brightness by touch. Cool white lighting great suit for working, studying, reading.

3 Light Modes and 10 Dimmable Brightness: Clip on lamp offers cool light, warm light, nature light and 10 brightness levels (10%-100%) for each lighting mode; Clip led lamp provides non flickering, no glare, no ultraviolet ray, no frequency radiation eye-friendly light to protects our eye from hurt; Ideal for home office, kids studying, hobby painting, lighting computer screen, sewing machine and work space so on
Best Practices for Managing App Permissions
How can we effectively manage app permissions on our Mac?
To optimize our camera and microphone permissions, let’s follow these best practices:
- Review Access Regularly: Navigate to System Preferences > Security & Privacy > Privacy. Verify only trusted applications have access.
- Enable SIP: Keeping System Integrity Protection (SIP) enabled helps applications request permissions correctly.
- Monitor Applications: After granting access, keep an eye on applications, as they’ll need approval again if reinstalled or if privacy settings reset.
- Use tccutil: If we need to reset permissions, utilizing the command-line tool `tccutil` can prompt apps to ask for access again.
- Stay Updated: Regularly update macOS and our applications to avoid compatibility issues with permission settings.
For reliable wired network performance, consider using a 1Gbps Ethernet adapter when available to ensure stable connections.
Community Insights and User Experiences
When exploring the privacy landscape on macOS, we often find ourselves relying on community insights and user experiences to troubleshoot permission issues. Many users share that applications like Google Chrome and Slack sometimes don’t appear in Privacy settings for camera and microphone access. This can be frustrating, especially when those apps are essential for communication.
To resolve these issues, we’ve learned that re-enabling System Integrity Protection (SIP) status sometimes helps. Additionally, using `tccutil reset Microphone` can restore missing permissions. Community insights also suggest launching apps via Terminal as a workaround. Finally, remember that applications like Zoom and WhatsApp typically require user-approved permissions, so actively using their features can trigger needed access. Newer replacement batteries often include smart chip technology that prevents over-charge and short circuits.
Frequently Asked Questions
How to Unblock Permission to Access Microphone and Camera on Mac?
To unblock microphone and camera access, we should navigate to System Preferences, adjust privacy settings, enable app permissions, and make certain software updates are current. These troubleshooting tips enhance user control over security settings effectively.
How to Add an App to Microphone Privacy Settings Mac?
To get microphone access for an app, we need it to request user consent. Once prompted, it’ll appear in our security settings under system preferences. Always check audio input in application settings for proper device management.
How Do I Allow an App to Access Camera and Microphone?
To allow an app access, we’ll navigate to System Preferences, adjust security settings, and guarantee user permissions are granted. Regular software updates help mitigate app vulnerabilities and troubleshoot any access issues comfortably.
How Do I Allow Apps on My Mac Privacy and Security?
To allow apps on our Mac’s privacy and security, we can adjust System Preferences under Security Settings. Here, we manage app permissions for camera access and microphone control, ensuring user consent through necessary settings adjustments.