As an Amazon Associate, we earn from qualifying purchases. Some links on this site are affiliate links at no extra cost to you. Our recommendations are based on thorough research and editorial judgment.

Ipad Audio I/O: Monitoring, Gain, and Latency
When managing audio I/O on an iPad, we must focus on monitoring, gain, and latency. First, we should select our audio interface and activate monitoring for live input. To get clear recordings, we aim for gain levels peaking between -12 to -6 dBFS. Next, adjusting the I/O buffer size helps balance latency and CPU usage, with lower sizes preferred for recording. Finally, using low latency monitoring and managing plug-in latency will streamline our playback experience. There’s more to explore to enhance our audio quality.
Key Takeaways
- Select a compatible audio interface with low-latency monitoring for optimal performance with your iPad.
- Adjust gain levels to peak around -12 to -6 dBFS for clean recordings.
- Utilize lower I/O buffer sizes to minimize latency during live audio monitoring.
- Regularly check and bypass high-latency plug-ins to improve tracking efficiency.
- Use higher sample rates if your system can handle them, reducing input monitoring latency.
Monitoring Audio Input and Output in Logic Pro
You may be interested


When we’re monitoring audio input and output in Logic Pro, it’s important to set everything up correctly to guarantee peak performance. Here’s how we can optimize our setup:
- Audio Device Setup: Select the appropriate audio interface within Logic Pro for proper signal routing.
- Enable Monitoring: Activate the monitoring feature to hear live input through our headphones.
- Low Latency Monitoring Mode: Use this mode to minimize delays by bypassing high-latency plugins, keeping our performance in sync.
- Adjust I/O Buffer Size: Smaller buffer sizes reduce monitoring latency but might increase the risk of CPU overload.
- Sample Rates: Choose higher sample rates for reduced latency, as long as our system can handle the processing demand.
Vacuum lap coolers can help maintain optimal laptop operating temperatures during long sessions, improving system stability and reducing thermal throttling for better performance with portable devices.
Recommended Products

Pro performance with great pre-amps - Achieve a brighter recording thanks to the high performing mic pre-amps of the Scarlett 3rd Gen. A switchable Air mode will add extra clarity to your acoustic instruments when recording with your Solo 3rd Gen

Used Book in Good Condition
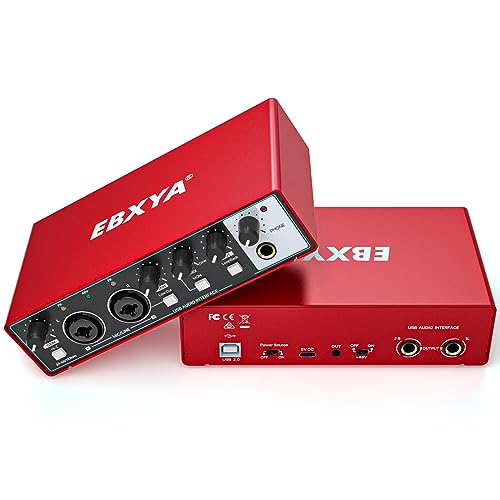
Plug and Play/Wide Compatibility:The USB Audio Interface can hook up to your Mac/PC or mobile device effortlessly, requiring no complex driver installation. It is very user-friendly for beginners. Additionally, it works seamlessly with most software available in the market, such as Logic Pro, Cubase, Pro Tools, Reaper and more. Small, ultra-portable size lets you take it with you anywhere, providing flexible options for your music production.
Adjusting Gain Levels for Optimal Recording

Setting appropriate gain levels is a key factor for effective recording. We need to adjust gain to avoid weak signals or distortion. Aiming for input levels that peak around -12 to -6 dBFS helps us achieve a strong, clean audio recording.
Tips for Adjusting Gain Levels:
- Use Meters: Monitor your audio interface or software’s built-in input meters to assess gain visually.
- Conduct Tests: Perform test recordings at various gain settings. This helps us identify the sweet spot for our specific microphone and environment.
- Maintain Fidelity: Proper gain staging minimizes the need for excessive post-production tweaks, ultimately maintaining audio clarity throughout the recording process. MAONO PD200XS offers dual interfaces (USB and XLR) which can help you compare levels between digital and analog inputs during testing.
Recommended Products

Podcast, Record, Live Stream, This Portable Audio Interface Covers it All - USB sound card for Mac or PC delivers 48kHz audio resolution for pristine recording every time
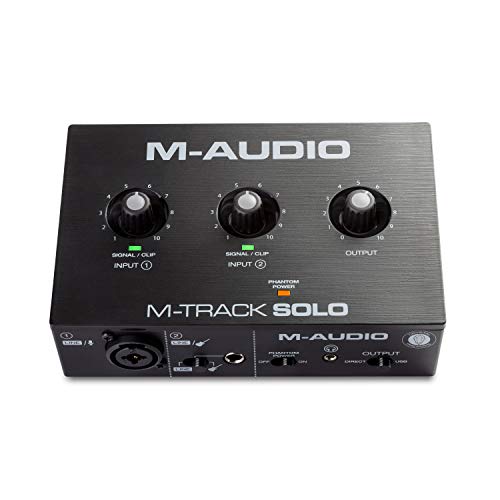
Podcast, Record, Live Stream, This Portable Audio Interface Covers it All - USB sound card for Mac or PC delivers 48kHz audio resolution for pristine recording every time

✔️[High-fidelity sound quality, accurate sampling] The Synido 2x2 audio interface uses a high-quality independent audio chip to reduce recording latency, support 24-bit depth and 48kHz sampling rate, and ensure every detail is restored. Whether it is recording or live broadcasting, it can provide a clear and natural sound quality experience
Understanding I/O Buffer Size and Its Impact

Understanding I/O buffer size is essential for managing how audio is processed in our recording setups. The I/O buffer size temporarily stores incoming and outgoing audio data, directly affecting latency levels during input monitoring.
- Low Buffer Sizes:
- Reduce latency, ideal for live recording.
- Increase CPU usage, risking overload in high-demand sessions.
- High Buffer Sizes:
- Ease CPU demand, providing stability.
- Introduce noticeable latency, less suitable for real-time tracking.
We should aim to set the I/O buffer size to the lowest possible setting for recording. If we experience performance issues, we can increase the buffer size through our audio settings. Managing this balance helps guarantee smooth operation across our channel strips while respecting latency limits. Compact, battery-powered mixers can help maintain portable setups with consistent monitoring and gain control portable mixers.
Recommended Products

【Audio device connection】The 4 Channel Audio Mixer is features USB audio interface, XLR, and 6.35mm jack, with a+48V phantom power button for microphone/line/guitar/bass/keyboard input. All channels support 3-channel equalizer, ultra-low noise, simple functionality, suitable for professionals and music enthusiasts.(Note: Condenser Mics Require +48V Phantom Power).

[XLR Mic Input] One XLR microphone input interface is set on the gaming audio mixer, which is great to up your audio quality with your XLR setup. The XLR mixer is a stepping stone to upgrade your live streaming. Audio mixer offered built-in 48V phantom power which opens up more choices for mics. Directly use it with your condenser microphone but do not solve added peripherals. (NOT available for USB mic)

4-CHANNEL AUDIO MIXING: Compact 4-channel stereo line audio mixer designed to combine multiple stereo or mono line-level audio sources into a single stereo output. Ideal for studios, live setups, rehearsals, streaming, and multimedia systems.
Achieving Low Latency With Monitoring Mode

Achieving low latency while recording can greatly improve our productivity and performance during sessions. To take advantage of Low Latency Monitoring Mode in apps like GarageBand and Logic Pro, we can minimize audio delays during real-time input monitoring.
Here are some key steps to follow:
- Adjust General Audio settings: Set the maximum allowable latency to enhance performance.
- Check Buffer Size: Regularly oversee I/O buffer size settings to maintain peak performance.
- Deactivate unneeded effects: Bypass any plug-ins introducing latency above the limit automatically to guarantee immediate feedback.
- Monitor Aux sends: Deactivated Aux sends and Send slots get indicated in gray, reducing processing load on our channels.
Also consider using a high-quality USB-C hub with low latency Ethernet and sufficient power delivery to ensure stable connections and reduced network-related delays.
Recommended Products

6-in-1 10Gbps USB C Hub: Inspire more potential of your laptop’s USB-C port with two 10 Gbps USB-C 3.2 Gen 2 port, two 10 Gbps USB-A 3.2 Gen 2 ports, 4K 60Hz HDMI and 100W Power Delivery. Ultimate all-in-one dock, works on multiple ports simultaneously

6 in 1 USB-C Hub: This USB C ethernent hub turns a single USB-C port into 6 ports with a 4K@30Hz HDMI, gigabit ethernet, PD 100W charging and 3x USB-A 3.0.

5-in-1 USB-C Hub: Experience comprehensive connectivity featuring a Power Delivery input, two USB-A 2.0 ports, a USB-A 3.0 port, and an HDMI port. (Note: The USB-C power delivery input port is only for connecting an external wall charger to power your laptop and cannot power peripheral devices.)
Managing Plug-in Latency for Smooth Playback

When managing plug-in latency, we need to be aware of how it can impact our recording sessions. High latency can introduce delays, affecting the timing for musicians. To address this, we can tap the Low Latency Monitoring Mode, which bypasses plug-ins exceeding the latency limit. This guarantees smoother playback and helps reduce monitoring delays.
Additionally, the I/O buffer size setting plays a significant role. Using a smaller buffer size will decrease monitoring latency but may increase CPU load. We should also consider higher sample rates; they lower input monitoring latency but can lead to larger audio files and processing strain.
Regularly checking our buffer size and sample rate will help maintain peak performance throughout projects involving software instrument tracks. A network switch can also improve studio stability by reducing packet delay and jitter when streaming audio over Ethernet, especially with Gigabit connectivity for larger setups.
Recommended Products

Discrete JFET instrument input, multifunctional rotary control with LED ring, DSP-based "low latency" software mixer with flexible routing matrix

Capture every detail of your sound: Imagine the perfect take, every note and beat, captured as if by magic. That's the MAONO PS22 Lite audio interface—designed for the recording enthusiast and streamer in you. With high-resolution recording at 24-bit/192kHz and a dynamic range of 106dB, this USB audio interface for PC and Mac ensures your sound is as clear and realistic as the original performance
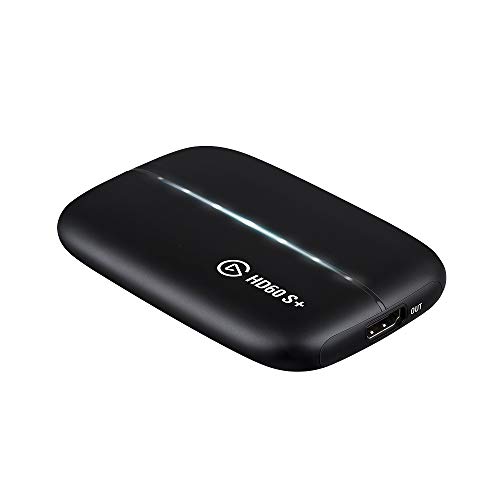
1080p60 HDR10 Capture: share your gameplay in superb viewing quality.
Frequently Asked Questions
Why Is My Ipad so Laggy and Delayed?
Our iPad’s laggy performance often stems from audio processing delays, background app interference, and hardware limitations. Employing iOS optimization techniques and keeping firmware updated can appreciably enhance application responsiveness and mitigate network impact factors.
Which Is Better, 50 Ms or 40MS Latency?
We’d say 40 ms latency’s better than 50 ms. Lower latency improves audio quality and recording performance, enhancing real-time monitoring. With ideal software and device compatibility, our user experience becomes smoother—thanks to efficient DSP processing.
How to Measure Audio Interface Latency?
To measure audio interface latency, we can use audio testing methods with latency measurement tools, analyze digital audio performance, and consider factors affecting latency. Understanding signal flow helps us optimize our recording setup and troubleshoot latency issues effectively.
What Is Latency on an Ipad?
Imagine sound racing to our ears—latency on an iPad is the hiccup slowing it down. By tweaking device specifications and audio buffers, we can enhance user experience and achieve better real-time processing for stellar audio performance.


